The little capsule in a microphone interprets the sound of the moment you are in. Sometimes you need sensitivity, sometimes you wish it wasn’t so sensitive, or maybe you wish it were sensitive in the right way.
Three Types of MIcrophones: The Tools in the Shed
A microphone does its job by measuring alterations in air pressure and translating them into alterations in an electric signal. There is a wide range of methods mics use to achieve this process.
Each method has advantages and disadvantages, there is no better or worse. You just need to find the right tool for the job.
So, let’s discuss the three main types of microphones for recording or amplifying vocals or instruments: dynamic microphones, condenser microphones, and ribbon microphones.
Engineers have calculated that the mic is responsible for 85% of the final audio result. So it’s worth understanding the tools available when it comes to mics.
If you don’t like the sound of a particular condenser mic on your voice and you want a different result, use a different tool. Try a ribbon microphone or a dynamic mic. Or if you just want a different-sounding condenser microphone, understanding what type of condenser you just used is crucial.
In the examples below, there are always exceptions to the rule. We aim here to give helpful general guidelines to mics rather than an explanation that covers all the corners of microphone-dom. See here for all things audio gear related.
Here are some deeper dives on specific microphone topics:
- In-depth microphone reviews
- Proximity effect in microphones
- Frequency response in microphones
- Polar patterns in microphones
For recommendations on mic choice, start with the following posts:
Dynamic Microphones
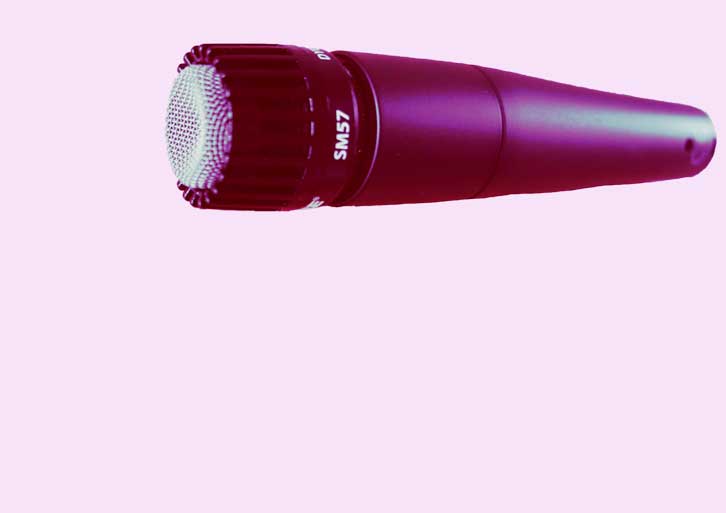
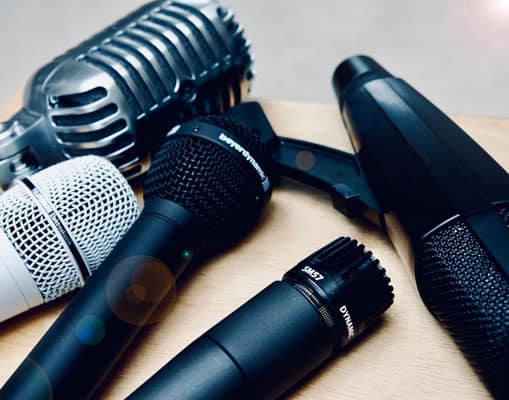
Dynamic microphones, epitomized by the classic Shure SM57 pictured here, are generally reliable, affordable, and provide fantastic results for the right applications. They have a wide range of suitable applications and are known to be rugged and hard-wearing.
How do Dynamic Microphones Work?
Dynamic mics work using the process known as magnetic induction.
A dynamic microphone has three main parts inside its capsule: a thin metal diaphragm, a metal coil, and a magnet. Sound waves cause the diaphragm to vibrate. This vibration, in turn, moves the coil. As a result, the movement of the coil in relation to the magnet translates sound waves into an electrical signals.
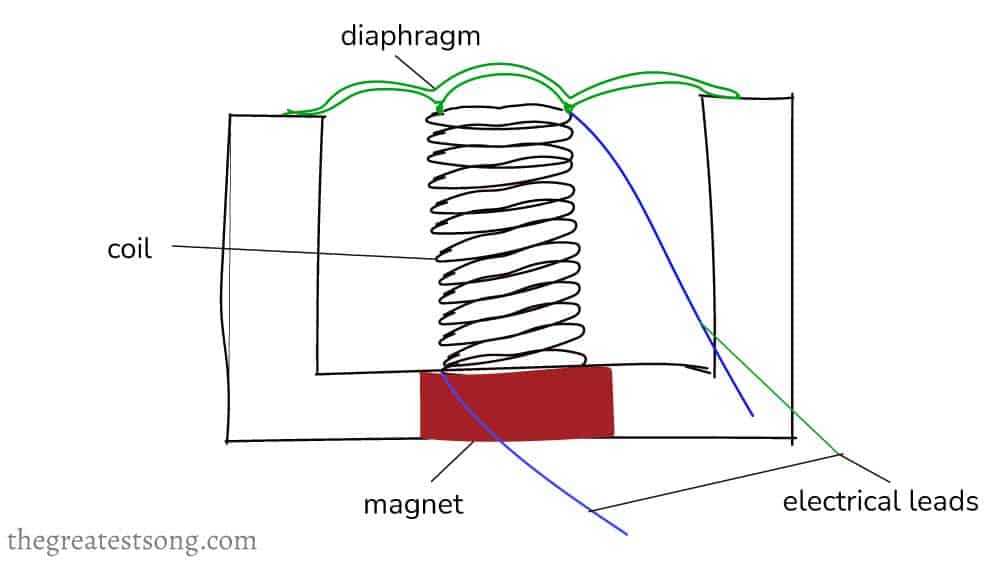
Dynamic mics require more sound to vibrate their innards than condensers. This is due to the coil AND diaphragm construction.
In the case of a dynamic mic, sound waves need enough pressure to vibrate two things (the coil and the diaphragm) rather than just one thing (the diaphragm only). Condenser microphones have only the diaphragm inside the capsule, making them more sensitive.
The Advantages of Dynamic Microphones:
- Cheaper
- Do not require a power source like 48V phantom power
- Best at handling high sound pressure levels (SPL) like kick drums
- Reject unwanted neighboring noise better than anything
- Durable
The Disadvantages of Dynamic Microphones:
- Not as good at picking up detail in the higher frequencies (vocal brilliance, harmonics) compared with condensers.
- Not as sensitive, nor as effective at recording intimate sounds
Examples of Dynamic Microphones
Typical Applications for Dynamic Microphones:
- Spoken vocals: broadcasting, podcasting, voice over
- Live stage: vocals, guitar amps
- Kick drums, loud amps, snares
Condenser Microphones
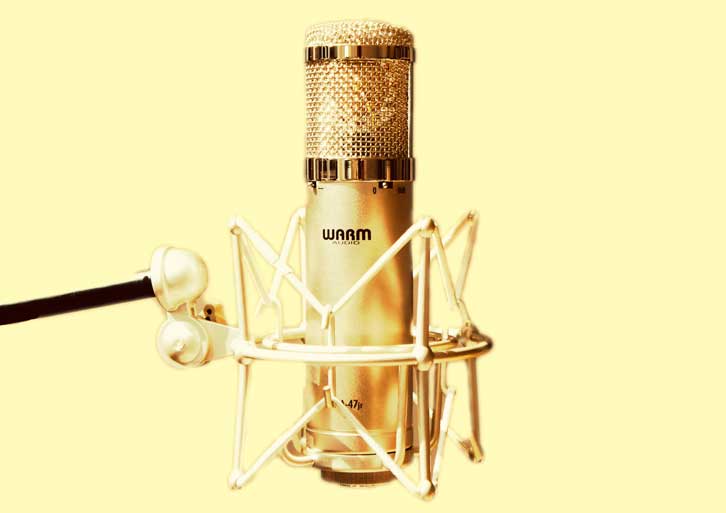
Condenser microphones are the first choice for most vocals, acoustic guitars, ensembles, all other acoustic stringed instruments, and more.
There are also advantages to using them on electric guitar amps, bass amps, brass, drum overheads, and almost anything else. They are the preferred type for studio recording.
How do Condenser Microphones work?
The Capsule
Like dynamic mics, condenser mics have a capsule in their guts containing that delicate, ever-so thin strip of metal, called a diaphragm. The diaphragm is attached to a solid metal backplate.
These strips of metal attached to each other are known as a ‘capacitor’. (Brits often call condenser mics ‘capacitor mics’)
When sound enters the capsule, the diaphragm moves a certain distance away from the solid metal plate. That distance is measured and converted into an electrical signal.
To measure this distance, condenser microphones need an electrostatic charge and that requires a power source.
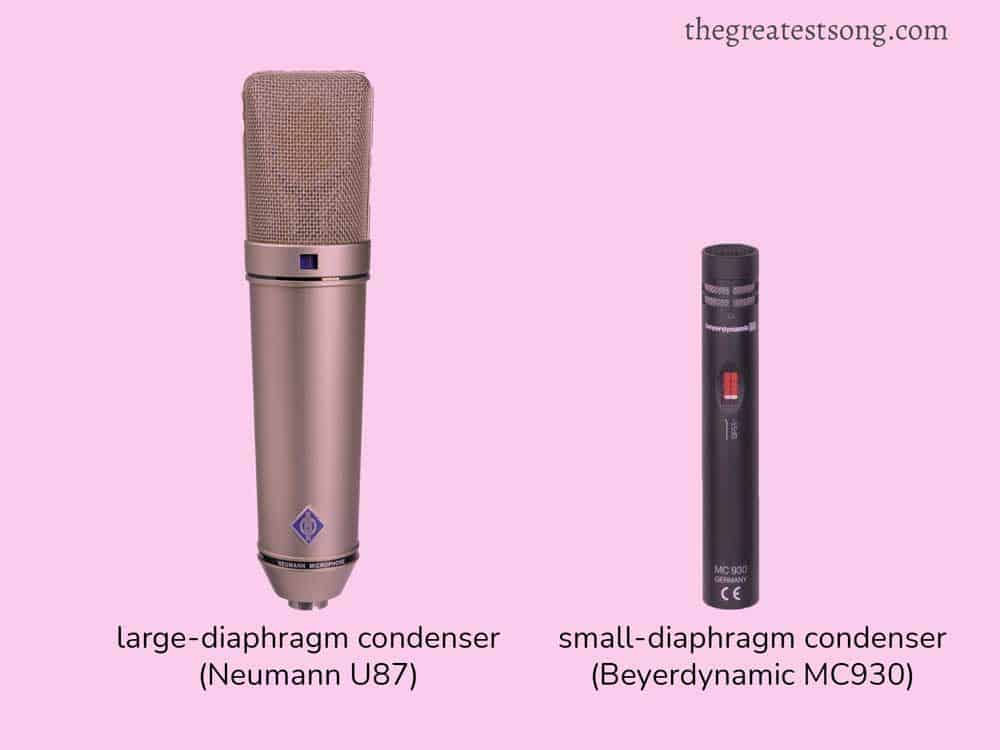
Large-Diaphragm and Small-Diaphragm Condenser Mics
The size of the diaphragm in a condenser mic determines how well it will respond to different frequencies.
Consequently, small-diaphragm condensers are more effective at picking up fine, top-end detail and quick transients (e.g., acoustic stringed instruments, or squishy sounds for ASMR videos). They also have the most consistent pick-up patterns.
Large-diaphragm condensers, with fuller mids and lows, are usually the mic of choice for vocals. In addition, they typically have lower self-noise than small-diaphragm condensers.
Condenser Mics: Further Classification
Large-Diaphragm Condenser Mic Capsule Designs
To build a ‘mic locker’, a collection of microphones that will capture a wide range of sonic characteristics, audio engineers consider the capsule design of a large-diaphragm microphone first.
Most of the sonic characteristics of a condenser microphone can be attributed to the microphone capsule. If you seek a different sound from your mic, first look for a mic with a different capsule design.
Most large-diaphragm condenser mics use one of the following capsule designs:
M7 Capsule
Quick facts: Discontinued by Neumann in 1959, PVC diaphragm, single backplate, center terminated, rarest type of capsule
Mics that use an M7-style capsule:
K47 Capsule
Quick facts: Created by George Neumann for the Telefunken U47 mic, center terminated, single backplate, also rare
Mics that use a K47-style capsule:
K67 Capsule
Quick facts: Developed by Neumann for the U67, center terminated, dual backplates, widely used and emulated.
Mics that use a K67-style capsule:
CK12 Capsule
Quick facts: Developed by AKG in 1951, edge terminated, dual backplate
Mics that use a CK12-style capsule:
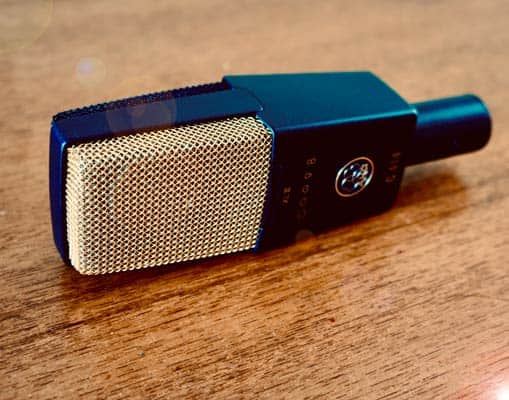
AKG C414 XLII, Telefunken TF51, Mojave MA-1000, Peluso Labs P12
Condenser mics all use a capsule with an electrostatic charge to measure the sound waves coming in – that is a constant.
But over the years, microphone makers have continued to tinker with the inner components that come after the capsule in the signal chain.
The Circuit
In addition to the capsule itself, the different components in the circuit of a microphone all leave their own sonic fingerprint on the final result, adding different harmonic colorations.
If you want to know what condenser mics will sound different and which ones will sound similar, after considering the capsule design, look at the component chain in the circuit. There are three typical circuit structures in condenser microphones:
- Tube Transformer
Examples: Mojave MA-300, Neumann U47, Lewitt LCT 940
- FET Transformer
Examples: Neumann U87(complete review), Aston Spirit, MXL V67G, Mojave MA-201 FET
- FET Transformerless
Examples: AKG C414 XLII, Neumann TLM 103 (see the TLM 103 review), Audio-Technica AT4033A
NOTE: Condenser mics with different component assemblies are likely to give different final results. If you’re after a different condenser sound, try a mic with a different construction.
The signal coming directly from the capacitor has high voltage with very little current, and it is unbalanced. Therefore, this signal is not ready to be received by recording devices and other gear.
The signal requires two steps before it can be received by other devices. One, it needs what is called an impedance converter which will stabilise the signal and make more current available. And two, the signal must be balanced.
Diagram: What the parts do
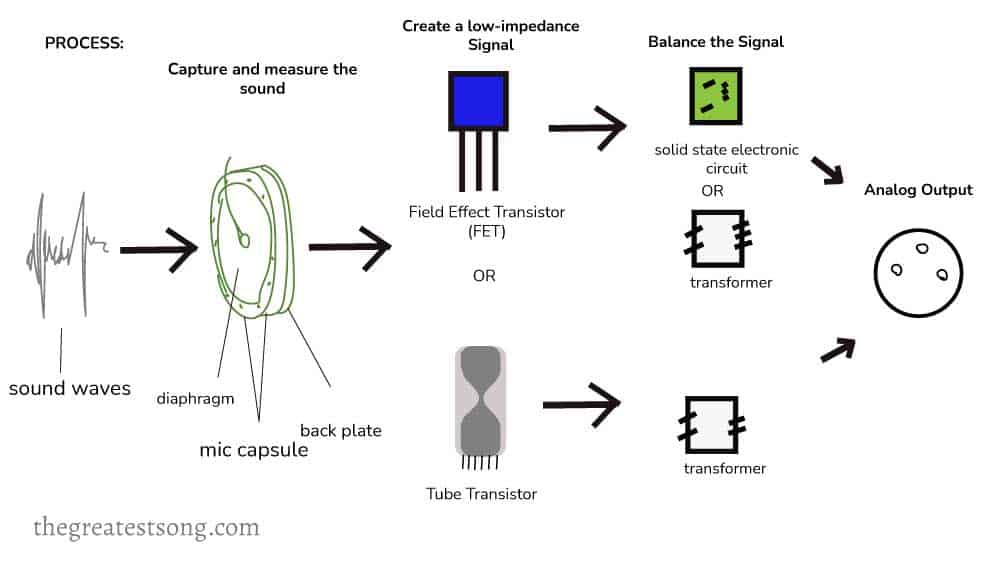
After the sound is captured and measured in the capacitor, we are at a point in the signal chain where condensers need to either use a FET (field effect transistor) or a tube transistor to stabilise the signal and make more current available.
Balancing the signal
Finally, the condenser mic takes the signal from its FET or Tube and balances it for analog output. This balancing of the signal is achieved either by a transformer or a more modern transformerless set-up using a solid-state electronic circuit.
What is a ‘balanced’ audio signal?
The balanced audio signal is two signal lines grounded by the cable shield. A balanced signal is always received by a differential amplifier. It measures the difference between the two signals and amplifies only that difference. In other words, anything the two incoming channels have in common (like the buzz from a nearby power line) is rejected.
A guitar amp buzzes around power lines because it receives an unbalanced signal from the guitar. It has one signal line in the cable and the cable shield and its amp amplifies that signal, warts and all.
A Note about Phantom Power
Phantom power (+48V), standard on most audio interfaces, is used by microphones that use a solid-state electronic circuit to balance the audio signal. The advantage is that it eliminates the need for an internal battery or a hefty external power supply
It is the most common power source used by condenser microphones today. It can be found on most interfaces in the form of a switch or a button.
The Advantages of Condenser Microphones
- Greatest range of frequency response
- Best at picking up subtle details
- Best with intimate sound sources like vocals and stringed instruments.
- Fastest response to transients, particularly small-diaphragm condensers
The Disadvantages of Condenser Microphones
- Can clip at high pressures (e.g. kick drum) and pick up unwanted background noise due to high sensitivity
- Generally more expensive
- The complex innards are sensitive and can be more easily damaged
Examples of Small-diaphragm Condenser Microphones
Typical Applications for Small-diaphragm Condenser Mics
- Live recording of ensembles, orchestras, classical music, jazz
- Acoustic guitar, violins, banjos and other strings
- Drums (overheads, snare, high-hat, cymbals)
- Piano
Examples of Large-diaphragm Condenser Microphones
Typical Applications for Large-diaphragm Condenser Mics
- Studio vocals: spoken or sung
- Drum overheads
- Guitar amps, bass amps
- Acoustic guitar
Ribbon Microphones
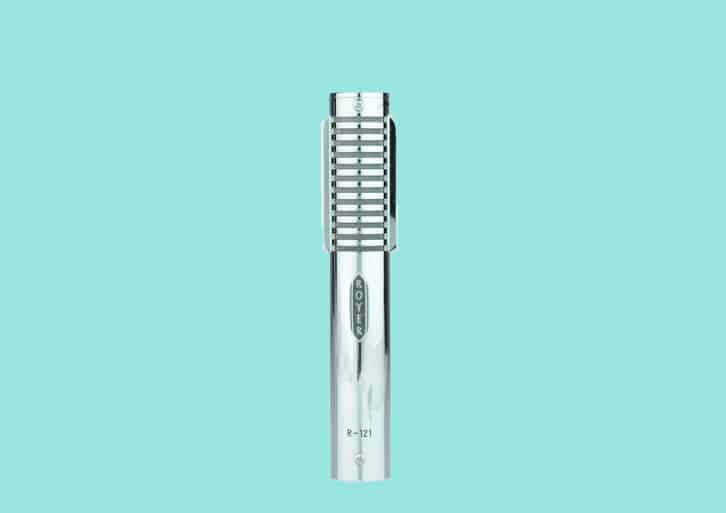
Ribbon microphones are the rare bird of these three types, often used when something ‘different’ is called for. Ribbon mics were the go-to in most studios from the earliest days of recording up until the 1960s.
As condenser microphone technology advanced, the ribbon was made nearly extinct. The mic makers at Royer revived the ribbon mic in the 1990s, making it a bit quieter and more durable than its ancestors. Today, it’s a standard complementary mic in most studios.
Ribbon mics are a go-to on sound sources that might be too bright sounding or harsh sounding such as brass or some guitar amps.
How do ribbon microphones work?
Like dynamic microphones, ribbons use magnetic induction to measure sound.
Inside a ribbon mic, is a thin strip of metal suspended between two magnets creating a magnetic field. Sound waves move the ribbon in relation to the magnetic field, translating the movement of air into an electrical signal.
The circuitry after the ribbon typically includes a transformer to balance the signal and lower the impedance.
The output is sometimes a bit too low requiring a lot of gain from a pre-amp which leads to a lot of noise.
Helpful tip: A workaround for many engineers is to use an inexpensive pre-pre-amp like a Cloudlifter. It will give you about 25 dB of clean gain and more headroom in the end.
It will also protect your delicate ribbon from an accidental phantom power connection.
Phantom power and ribbon mics
Ribbon mics come in three typical assemblies: Passive, Active FET, and Active Tube.
Be aware that phantom power can destroy Passive Ribbon Microphones. Active ribbon mics, however, require phantom power (or another power source) to operate. Always double-check the power requirements of your ribbon mic!
Note: Ribbon mics are destroyed by phantom power only when partially connected before the signal is balanced. To be safe, always switch phantom power off, plug the mic in, then switch phantom power on (only if required!).
The Advantages of Ribbon Microphones:
- The gentle roll-off on the high end makes for a warm, vintage darkness
- good transient response
- Sometimes referred to as ‘the most natural-sounding mic, warm, mellow’
The Disadvantages of Ribbon Microphones:
- Generally fragile
- Low output requires considerable gain from your pre-amp
- Expensive
- Fixed figure-8 polar pattern
- Sometimes said to be ‘dull’ or ‘not sensitive enough’
Examples of Ribbon Microphones
Typical Applications for Ribbon Microphones
- Sung Vocals
- Guitar amps
- Brass instruments
- Wooden percussion
- Woodwinds
Questions or Comments?
Join the discussion here on Facebook.
