These 8 tips for recording vocals are the things I wish I knew ages ago. Everything on this list, I learned by doing it the wrong way first.
I hope you have fewer recording headaches because of this post.
Tip 1 | Consider Distance, Mic Height, Mic Angle
Take some time to get the distance between the singer and the mic, the mic height, and the mic angle right. You can massively change the recorded sound of a voice with subtle adjustments and careful listening. Best of all, you don’t need any fancy tech!
For dynamic mics, start about 2 inches away and increase the distance from that point. For condenser mics, start about 6 inches away.
As you alter the distance between singer and mic, the closer you are, the more intimate it will sound. That said, proximity effect (increased boomy bass presence the closer you get) will vary from mic to mic. Experiment to taste.
Mic height will affect frequency as well. Start with the mic at mouth height. Move down for more bass, raise for high-end.
The mic angle is the third factor in this equation. Straight into the mic can sometimes produce unwanted sibilance (S sounds) or plosives (RRR, P, T, K sounds). Angle off slightly left or right and you can significantly reduce these unwanted effects.
Tip 2 | How to Avoid reflected sound in a Room
Where do you put the mic in the room?
The general idea in mic placement is to avoid the bounces off the walls in your room. Get as far away from the walls as possible, while avoiding the center.
The very center of most rooms should be avoided as this is a sweet spot for reflected sound. If you’re too close to the wall, your mic will pick up the bounce off that wall.
Tip 3: How To Get Rid of Unwanted Plosives
To get minimize plosive problems (Rrrr, P, T, K sounds that smack your levels suddenly) a simple trick an engineer taught me is to simply roll off the bottom EQ around 100 Hz. You’ll be amazed at how it gets rid of most of your plosive problems!
Of course, the most obvious helper regarding plosives is a standard pop filter. Pop filters don’t stop all plosives, but they will keep them under control.
Tip 4: How to Get Rid of Mouth sounds

The key is acid. Tripping on acid is probably not the best idea for vocal recording. However, a bit of fruity acidity can be a helpful friend in minimizing mouth noise.
A Granny Smith apple is a classic studio trick for this. My preference is pineapple, which has natural anti-inflammatory compounds to boot. But any fruit with a bit of acidity will get rid of that sticky-clicky tongue sound.
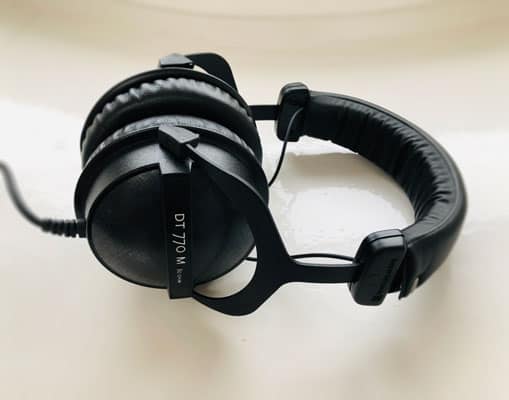
Tip 5: Use Some Solid Cans
Thinking that it wouldn’t make much difference, for years, I used some crap headphones for tracking in my home studio.
When I finally got a decent set, it changed all my takes. I found myself able to react to the live sound as I sang because I could finally hear it accurately.
Find some headphones with accurate monitoring and a decent size soundstage. They won’t set you back much and they make a big difference. For more info, see our headphones for vocal recording buyers guide.
Tip 6: Add A Smidge of Compression in Front of the Signal
In the dark ages, they used to add a touch of compression to vocals with an analog compressor before the signal hit the reels.
If you’ve got a lovely analog compressor, use it! Adding a touch allows you to present the best source signal possible to your digital converter.
If you don’t have analog tanks around, many audio interfaces (for example, Universal Audio interfaces via Console) will allow you to add compression and other plug-ins before the signal is recorded in your DAW.
As almost all vocals benefit from a bit of compression, this gives you a great sound right off the bat. It also will save you valuable DSP, sometimes reducing the number of plug-ins you’ll need on each track.
Tip 7: Treat the Room, No Need to Get Fancy
Blankets are your friend. In the studio, things rattle, you get unwanted reflections off walls, you and your gear are cold… Whether you’re in a professional studio or hacking it in your garage, blankets can solve all sorts of problems while recording.
Another quick solution for an untreated space is to use a reflection filter like the SE Electronics or Aston variety.
Tip 8: Use an Insurance Mic
Another great engineer tip I got was to use place a second microphone behind your favorite vocal mic. Set the level about 10 dB lower on the second mic. Now, this second mic is your insurance against clipping. Swap in the Insurance track as needed.
